19 January 2021

Test Flight 2: Engine break-in, initial full flap deployment, initial autopilot powering


Test Flight: 2
Date: Monday January 18th
Description: Second flight of the aircraft
Objectives: Extensive preflight and run-up of the aircraft, normal take off with 0 degree flaps, verification of squawk resolutions (oil door, alternator belt, prop governor max RPM), depart the pattern for engine break in, initial auto pilot deployment, initial flaps to 100% deployment, return to base, normal full flap landing.
Airplane Condition: 60 gallons of fuel, 9 qts of oil as read on the dip stick, 50lbs of ballast in the baggage compartment, single pilot (150lbs)

Test Flight Track Log:

Pilot Notes:
    1) Max RPM on takeoff was 2720. One more rotation of the max rpm set screw should be sufficient
      2) CHT1 started getting warm on a 105KIAS climb. Probably would help to cut the air dam back more, but also the climb was a bit steep. Maybe more around a 120KIAS climb would be sufficient.
        3) Autopilot initial deployment indicates that the pitch trim direction needs to be reversed, autopilot twice in a row ended up in a pretty steep nose down pitch trim attitude about 10 seconds after enabling. Yaw damper and Heading modes seemed to work perfectly, but it was a bit hard to tell when the pitch trim was trying to kill me.
          4) I had the tanks topped off for this flight. Configuration of fuel levels with full tanks was pilot error. I set calibration points on both the left and right tanks at 60 gallons per side by accident. That threw off the curve to the point where fuel gauges were not accurate.
            5) Screwed up audio recording again. The new sony recorder was not picking up the mic input. Audio in video was from liveATC
              6) 80 knots over the numbers with full flaps seems a little fast, had a long time over the runway and was fighting the float. I will lower this speed down after I get good stall speed numbers.
                7) During runup, left ignition had a drop of 200 RPM, two cylinders looked to have fouled plugs. Ran for 10 seconds at 55% power while leaning for max RPM. That cleaned up the EGTs and mag check was back to matching the right side after that. I have been been running too rich, no doubt there. I have been focused on CHT numbers, but will start testing leaning on the next test flight. Also need to lean for ground ops.
                  8) Used Left tank for takeoff. The first flight I used Right. I have been making some steeper banks, but I should test right turns next flight.
                    9) COM1 audio is great. The COM2 antenna needs a ground plane. COM2 RX/TX is fine when the other side is in range. Everyone reads my 5/5, however two things. COM2 will break squelch from COM1 TX depending on selected frequencies. Also COM2 has just a touch less sensitivity when trying to get things like ATIS from the air from afar.

                    Squawks:
                      1) COM2 breaking squelch on COM1 TX. COM2 sensitivity weaker than COM1. COM2 could use a ground plane.
                        2) Max RPM on takeoff was 2720. Proper Governor Max RPM needs further adjustment
                          3) CHT1 is still the hottest cylinder. The spread is only 40 degrees from hottest to coldest, but CHT1 could probably benefit from some additional right side air dam reduction
                            4) Fuel level curve is out of sync with reality. Delete the 60 gallon erroneous calibration points and re-calibrate 30 gallons on each tank before next startup.
                              5) Autopilot pitch trim running away. Reverse autopilot pitch trim direction.

                              6) While the charging system is stable, I would still like to see if I can get the 0.2v differential out of the x-feed contactor. That is, my AUX bus when the alternator is on runs at a voltage 0.2v lower than MAIN. It is not that surprising given the number of connectors between the two busses. In order for the AUX battery to get alternator voltage it has to get through terminals on the MAIN contactor, X-FEED contactor, and then the AUX contactor. One or more of those terminal to terminal connections needs to be cleaned. 


                              Garmin Aviation Log Parser

                              Two flights in and I already got really annoyed at building excel charts for my Garmin engine/air logs. I started a new git repository for anyone that wants to work with me here, but it is pretty easy to get from Garmin CSV logs to interactive standardized charts using a little python and the plotly library. 


                              Here is the repository link if you are interested: GitHub

                              10 January 2021

                              Test Flight 1: First Flight!


                              Test Flight: 1
                              Date: Sunday January 10th
                              Description: First flight of the aircraft
                              Objectives: Extensive preflight and run-up of the aircraft, high speed taxi / aborted takeoff, normal take off, initial systems checkout while in the pattern, depart the pattern for engine break in, return to base, normal landing.
                              Airplane Condition: 40 gallons of fuel, 9.5qts of oil as read on the dip stick, 50lbs of ballast in the baggage compartment, single pilot (150lbs)


                              Test Flight Track Log:


                              Test Flight Report:


                              05 January 2021

                              DAR Inspection

                              After a lot of back and forth with the FAA/FSDO(s) (months) I was able to finally get an appointment to get N5412K inspected. Yes, it was a lot of paperwork, no doubt about that, but the process was more or less straight forward on my side of it. I think all of the DARs are struggling with the new AWC application system, but that is a different story.  I felt fairly well prepared and didn't run into anything that I completely missed. The short of it, N5412K now has an airworthiness certificate. 

                              The one thing to really watch for in this process is the actual text in the Phase II kinds of operation. We had to go back and forth a couple of times with the DAR (the new AWC process) in order to ensure that all of the language was correct in order to get VFR, Night VFR, and Instruments defined in Phase 2 Kinds of Operation. Thanks to the RV10 community for helping me with the exact language to look for.

                              The process itself was more or less how all of the other blog posts read. Once I was able to find someone that was able to come out, we started the conversation about 30 days prior to the actual inspection. The DAR sent me a checklist of things that he was going to go through and I reciprocated with sending this blog URL with the caveat of "this blog is not actually my build log, I have a real build log." 

                              The process itself was fairly quick. It was more or less a very comprehensive pre-flight (with the inspection covers off) with in-depth inspection into some key areas that I am assuming that either are personal importance to the DAR or pushed down from the FAA. I had two tables with my build logs, the paperwork, the photos, the invoices, etc. We didn't really dig much into each individual entry, but when I scrolled through my photos and electronic build logs the DAR was satisfied that I met those requirements probably purely on the size of the folders. The plane itself had its main root fairings, inspection covers, cowl, baggage bulkhead panel off. For the items of the plane that where not immediately visible I did have photos of every mechanical connection for the things that I did not have access to. For instance I did not have any of the tunnel open or the seats out, but I had photos of every linkage, fuel system fitting, brake system fitting, and electrical connector for anything that was not immediately visible. As a backup I did have an endoscope camera ready to go just incase there was something we wanted to see that I did not have a photo for.

                              When the DAR sent over the checklist, I did ask a couple of questions and had photos in those questions to make sure things like my ELT antenna placement were going to be acceptable to him. The other common things that everyone else has said/argued I made sure were a non-issue. i.e. Control stick contact with anything, the availability of a Whiskey Compass, etc. The only unexpected thing that happened was the night before the inspection the FSDO asked for the Kit Built checklist. The DAR felt bad about this because everyone knows the RV10 is already on the approved kit list, but we made the decision that fighting it was not worth it, it was easy enough to complete and submit rather than argue.


                              09 December 2020

                              Final Rigging

                              I performed an initial rigging a couple of months ago when I had to bend the control sticks into a tighter radius in order to clear the panel, but I was always intending to run that one more time right before I buttoned everything up and conducted the final "condition inspection". A post over in the forums led me to the actual location of the flight control limits. The limits are in the "techniques" manual rather than the build manual! 


                              The actual limits that need to be verified:

                              I ended up re-checking with the gauge that the ailerons were neutral at the bell crank and then moved the right wing control rod a turn and a half. 


                              Left Flap (0 degree)

                              Left Flap (Reflex position)

                              Right Flap (0 degree)

                              Right Flap (Reflex Position)


                              Left Aileron in trail

                              Left Aileron Up

                              Left Aileron Down

                              Right Aileron in trail

                              Right Aileron Up

                              Right Aileron Down

                              Elevator (left side) in trail

                              Elevator (left side) Down

                              Elevator (left side) Up

                              Elevator (right side) in trail

                              Elevator (right side) Down

                              Elevator (right side) Up

                              Pitch Trim (left side) Tab in trail


                              Pitch Trim (left side) Tab Up

                              <need to re-take the photo>

                              Pitch Trim (left side) Tab Down


                              Pitch Trim (right side) in trail

                              Pitch Trim (right side) Tab Up

                              Pitch Trim (right side) Tab Down

                              20 October 2020

                              Weight and Balance

                              It is getting real now! With everything on the plane (at least first flight wise) it was time for the weight and balance. I am going to keep some of the interior out of the plane until Phase I is done. So the pretty side panels, carpet, and anything that covers up quick access to things like the wiring I am going to keep off. That said I will have to do another weight and balance when Phase I is complete.

                              Thankfully EAA 186 has a set of scales. Not only do they have a set of scales, but they have the complete setup that was plug and play to include the ramps to get onto the scales. While I did this by myself, it would have been handy to have a second set of hands to get the plane up onto the scales. While an inch and a half incline does not seem like a lot (especially over that ramp distance) I had to take a pretty good running start to get up onto the scales, and then stop quick enough in order to not blow past them. Quick reminder to zero the scales otherwise you will have to struggle getting the plane onto the scales twice...

                              With the plane on the scales, the next step was to put the plane into flight level. This line can get picked up at the door sills. Thanks to Jim at the chapter for mentioning to me prior to the start of this that letting the air out of the tires is the preferred approach to get the plane level. That worked well and was way easier than what I had planned in my head for incrementally adding shims under the main tires.


                              With the plane centered on the scales and centered, it was time to take some measurements. I started my marking out some layout lines and taking the measurements. The datum point in the exemplar W&B from Vans is 99.44 inches forward the wing leading edge. I marked that out and then took the measurements back from the Datum back to the nose wheel and the left and right main wheels.


                              That was pretty straight forward. With all of the layout done it was time for the big (moment). Taking the obligatory new baby weight photo! N5412K weighed in at 1650 lbs and was about as close as I could imagine it being from left and right balance. This puts me along side everyone else where I will probably contemplate flying with some ballast in the baggage area while flying by myself. That said, without ballast and single pilot N5412K is still within limits, so awesome!


                              Flight Test CG


                              25 August 2020

                              Control Stick Bending

                              Something I have been putting off for far too long... When I put my panel in I ended up putting some switches and breakers into the standard location that the Aerosport panel has designed. That looks really nice, but after finally having everything rigged, the control stick would contact the switches prior to the stops in the control surfaces making contact. The internet is very helpful as everyone else that has installed the panel has also had a similar issue. (although it sounds like a lot of people just fly like that)

                              A lot of the solutions involved heating, bending, cutting, welding. So with all of that, I decided to wait in the process to when I had things close to final rig to ensure I knew exactly how much additional clearance I needed. I also ordered two new control sticks as I was assuming it was going to take a couple of different tries in order to get it where I wanted.  

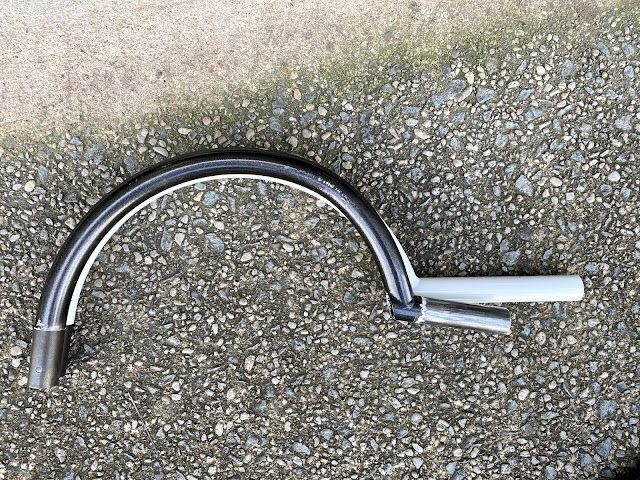
                              I started with taking my existing control sticks out. I was about to cut them to weld some DOM tube extension but before I went down that path I figured I would just bend them a little to see how things looked. You do not want to bring the stick much more aft as it is already in your lap on full nose up. Also, you don't want to make a bend too low in the stick because (with my short legs) the stick will contact the seat cushion. 

                              With that, I grabbed a pipe bender from the place I most hate (harbor freight) and with the 1/2" mandrel bent the control stick 5 pumps at a time as high as I could. On the first 5 pumps I could see that it was having a significant impact. By the time I got to 10, the control stick with my custom grips was no longer contacting the switches by itself, but with my hand on the stick I could see myself accidentally flipping all of the switches off on a controls pre-flight check. With 15 pumps on the press you can see how much movement I got (and where I got it). 


                              At this point I was still thinking I was going to use the control stick as a template and move on to bending the new sticks, but I went ahead and installed them into the plane and everything fit very nicely. I am 5'7" and with the seat all the way forward in the forward most notch of seat adjustment (not where I fly, but the worst case for clearance) the stick came back full nose up and fit very nicely in my lap. I definitely hit the elevator stops before my body. (but I am also 150lbs). With both of the originals bent identically I called it a day as I was not sure I was going to be able to replicate that. Also, the original sticks were match drilled for the control stick horns, and I figured it would be difficult to re-drill the new sticks without enlarging that holes in that part.


                              Done.